
Last Updated: July 2025 | Reading Time: 15 minutes
Are you tired of slow hosting, complicated server management, and technical headaches? You’re not alone. According to recent studies, 53% of mobile users abandon sites that take longer than 3 seconds to load. That’s where Cloudways comes in—a managed cloud hosting platform that makes powerful hosting simple.
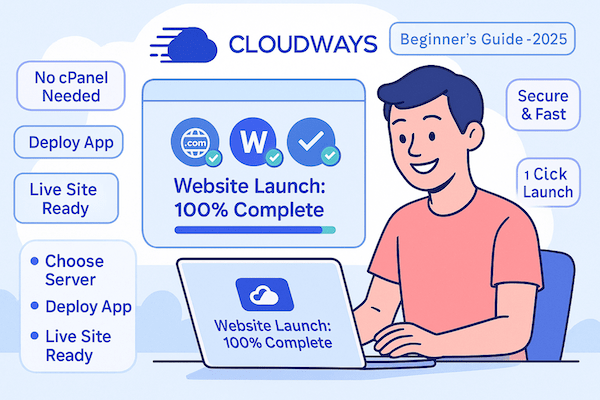
In this comprehensive guide, I’ll walk you through launching your first website on Cloudways in under 30 minutes. No technical expertise required!
🚀 Follow this guide and launch your website with Cloudways today — get 3 days free with no commitment.
What is Cloudways? (And Why It’s Different)
Cloudways is a managed cloud hosting platform that acts as a bridge between you and powerful cloud providers like DigitalOcean, AWS, Google Cloud, Vultr, and Linode. Think of it as having your own IT team that handles all the technical server management while you focus on building your website.
Key Features That Set Cloudways Apart:
⚡ Lightning Fast Performance
Built-in caching, CDN, and optimized stack deliver page loads under 1 second
🛡️ Fort Knox Security
Dedicated firewalls, regular patches, and automated backups protect your data
📈 Infinite Scalability
Handle traffic spikes with one-click vertical scaling – no downtime required
🎯 Developer Friendly
SSH/SFTP access, Git deployment, staging environments, and WP-CLI
What makes Cloudways different from traditional hosting?
- No cPanel: Custom-built control panel designed for simplicity and power
- Pay-as-you-go: Only pay for resources you actually use (hourly billing available)
- Multiple apps per server: Host unlimited websites on a single server
- Built-in CDN: CloudwaysCDN or integrate with Cloudflare/StackPath
- 24/7 expert support: Real humans who actually understand servers
Understanding Cloudways Pricing
Cloudways offers transparent, pay-as-you-go pricing with no hidden fees. Here’s what you can expect:
| Provider | Starting Price | Best For | Key Features |
|---|---|---|---|
| DigitalOcean | $14/month | Small to medium sites | 1GB RAM, 1 Core, 25GB Storage |
| Vultr HF | $16/month | High-traffic sites | 1GB RAM, 1 Core, 32GB NVMe |
| Linode | $14/month | Global audience | 1GB RAM, 1 Core, 25GB Storage |
| AWS | $38.56/month | Enterprise sites | 1.75GB RAM, 1 vCPU, EBS Storage |
| Google Cloud | $37.45/month | Enterprise sites | 1.7GB RAM, 1 vCPU, 20GB Storage |
💡 Pro Tip: Start with DigitalOcean or Vultr HF for the best price-to-performance ratio. You can always migrate to AWS or Google Cloud later without downtime.
Getting Started: Create Your Account
Let’s begin your Cloudways journey with their risk-free trial:
- Step 1: Visit the Cloudways website and click “Start Free Trial“
- Step 2: Fill in your details:
- Full name
- Email address
- Password (use a strong one!)
- Step 3: Important: Look for “Got a Promo Code?” link and enter a valid code for discounts
- Step 4: Select “I agree to terms” and click “Start Free”
- Step 5: Check your email and verify your account
⚠️ Verification Required: Cloudways may ask for additional verification to prevent abuse. This typically includes:
- Phone number verification
- Website URL (if you have one)
- Brief description of your project
Don’t worry—this is a one-time process that takes just 2-3 minutes.
Step 1: Launch Your First Server
Once verified, you’ll see the Cloudways dashboard. Here’s how to launch your first server:
Choose Your Configuration
- Step 1: Click “Launch Server” or “+” button
- Step 2: Select your application:
- WordPress: Standard WordPress installation
- WordPress with WooCommerce: For online stores
- Multisite: For network of sites
- Clean WordPress: Without Cloudways optimizations
- Step 3: Name your application (e.g., “My Blog”)
- Step 4: Name your server (e.g., “Production Server”)
- Step 5: Select a project (helps organize multiple sites)
Select Infrastructure Provider
🎯 Beginner Recommendation: Choose DigitalOcean Premium with 2GB RAM for optimal performance. It costs ~$28/month and can handle 50,000+ monthly visitors.
Choose Server Size
- 1GB: Personal blogs, portfolios (up to 25,000 visitors/month)
- 2GB: Business sites, small stores (up to 50,000 visitors/month)
- 4GB: Growing stores, membership sites (up to 100,000 visitors/month)
- 8GB+: High-traffic sites, large WooCommerce stores
Select Server Location
Choose the location closest to your target audience:
- Americas: New York, San Francisco, Toronto
- Europe: London, Frankfurt, Amsterdam
- Asia Pacific: Singapore, Mumbai, Sydney, Tokyo
Click “Launch Now” and wait 7-10 minutes for server provisioning.
Step 2: Install WordPress (It’s Already Done!)
Here’s the beautiful part—WordPress is already installed! Cloudways automatically sets up:
- ✅ Latest WordPress version
- ✅ Optimized PHP configuration
- ✅ MySQL database
- ✅ Object caching (Redis/Memcached)
- ✅ Cloudways optimization plugin
Access Your WordPress Site
- Step 1: Go to Applications tab
- Step 2: Click your application name
- Step 3: Find Access Details
- Step 4: Copy the temporary URL and admin credentials
- Step 5: Click the URL to visit your site
🔐 First Login: Use the provided username and password. Change the password immediately after logging in for security.
Step 3: Connect Your Domain
Time to connect your real domain name (e.g., yoursite.com) to your Cloudways server:
In Cloudways:
- Step 1: Go to your Application → Domain Management
- Step 2: Click Add Domain
- Step 3: Enter your domain:
yoursite.com - Step 4: Also add:
www.yoursite.com - Step 5: Set primary domain (usually the non-www version)
- Step 6: Save changes
At Your Domain Registrar:
You need to point your domain to Cloudways by updating DNS records:
- Step 1: Log into your domain registrar (GoDaddy, Namecheap, etc.)
- Step 2: Find DNS management
- Step 3: Add/Update these records:
A Record:
Name: @ (or leave blank)
Value: Your server IP (found in Cloudways → Server Details)
TTL: 300
A Record:
Name: www
Value: Your server IP
TTL: 300
DNS propagation takes 1-48 hours. You can check status at whatsmydns.net
Step 4: Secure Your Site with SSL
HTTPS is non-negotiable in 2025. Here’s how to enable free SSL:
- Step 1: Wait for DNS propagation (domain must resolve to Cloudways)
- Step 2: Go to Application → SSL Certificate
- Step 3: Enter your email address
- Step 4: Select domain(s) to secure
- Step 5: Click Install Certificate
- Step 6: Enable HTTPS Redirect (forces secure connections)
🔴 Common SSL Error: “DNS verification failed” means your domain isn’t pointing to Cloudways yet. Wait for DNS propagation or double-check your A records.
Step 5: Set Up Email Delivery
WordPress needs to send emails for contact forms, password resets, and notifications. Cloudways servers don’t send emails by default (prevents spam), so you need an SMTP service:
Option 1: Elastic Email (Recommended)
- Step 1: First, upgrade your Cloudways account (required for add-ons)
- Step 2: Go to Add-ons → Elastic Email
- Step 3: Choose a plan:
- 1,000 emails/month: $0.10
- 10,000 emails/month: $1.00
- 100,000 emails/month: $10.00
- Step 4: Subscribe to your chosen plan
- Step 5: Go to Server → SMTP
- Step 6: Select Elastic Email and enable
Option 2: Custom SMTP
Use services like SendGrid, Mailgun, or Gmail SMTP with plugins like WP Mail SMTP.
Step 6: Optimize for Speed
Cloudways includes powerful optimization features. Here’s how to enable them:
Enable Varnish Cache
- Step 1: Go to Server → Manage Services
- Step 2: Find Varnish and click Enable
- Step 3: Go to Application → Varnish
- Step 4: Enable Varnish for your application
Configure Redis Object Cache
- Step 1: Install Redis Object Cache plugin in WordPress
- Step 2: Go to Settings → Redis
- Step 3: Click Enable Object Cache
Set Up CDN
Option 1: CloudwaysCDN ($1 per 25GB bandwidth)
- Go to Application → CloudwaysCDN
- Click Create
- Enable in WordPress with Breeze plugin
Option 2: Cloudflare (Free plan available)
- Sign up at Cloudflare.com
- Add your site
- Update nameservers at registrar
- Enable proxy (orange cloud)
Install Optimization Plugin
Cloudways includes Breeze cache plugin. Configure it:
- Enable all cache options
- Minify HTML/CSS/JS
- Enable Gzip compression
- Lazy load images
Step 7: Configure Backups
Protect your hard work with automated backups:
Enable Automated Backups
- Step 1: Go to Server → Backups
- Step 2: Set backup frequency:
- 1 hour (mission-critical sites)
- Daily (recommended for most)
- Weekly (low-update sites)
- Step 3: Set retention period (7-30 days)
- Step 4: Choose backup time (low-traffic hours)
Create Manual Backup
Before major changes, create on-demand backups:
- Application backup: Just your WordPress files
- Server backup: Everything on the server
Migrating an Existing Website
Moving from another host? Cloudways makes it painless:
Option 1: Free Cloudways Migration
- Contact support via live chat
- Provide source hosting details
- They handle everything (1 free migration)
Option 2: WordPress Migrator Plugin
- Step 1: Install “Cloudways WordPress Migrator” on OLD site
- Step 2: Get destination details from Cloudways app
- Step 3: Enter details in plugin
- Step 4: Start migration
- Step 5: Update DNS when ready
Option 3: Manual Migration
For advanced users using SFTP/SSH and database exports.
Common Issues & Solutions
🔴 “Error Establishing Database Connection”
Solution: Restart MySQL from Server → Manage Services → MySQL → Restart
🔴 White Screen of Death
Solution:
- Increase PHP memory limit in Server → Settings → PHP
- Disable all plugins via SFTP
- Check error logs in Application → Logs
🔴 Slow Loading Speed
Solution:
- Enable Varnish + Redis
- Optimize images (use ShortPixel/Imagify)
- Upgrade server size if needed
- Check for plugin conflicts
🔴 SSL Not Working
Solution:
- Verify DNS is pointing to Cloudways
- Clear browser cache
- Re-install certificate
- Check for mixed content warnings
Frequently Asked Questions
How long is the free trial?
Cloudways offers a 3-day free trial starting when you launch your first server. No credit card required. You can explore all features except paid add-ons.
Can I host multiple websites?
Yes! You can host unlimited applications on a single server. Each 1GB server can typically handle 2-3 small WordPress sites.
Do I need technical knowledge?
No. Cloudways is designed for beginners. Their support team is available 24/7 to help with any technical issues.
What happens after the trial?
You’ll need to add payment details to continue. Billing is pay-as-you-go (monthly) with no contracts. Cancel anytime.
Can I upgrade/downgrade servers?
Yes. Vertical scaling (RAM/CPU) takes just minutes with zero downtime. You can also clone servers or migrate between providers.
Is email hosting included?
No. Cloudways focuses on web hosting. Use Google Workspace or similar for email inboxes, and SMTP add-ons for transactional emails.
How does billing work?
Pay-as-you-go hourly billing, charged monthly. For example, a $28/month server costs ~$0.039/hour. Delete servers anytime to stop charges.
🎉 Congratulations! You now know everything needed to launch your website on Cloudways.
Ready to experience hosting that doesn’t suck?
🚀 Start Your 3-Day Free Trial Now →
No credit card required • Launch in 10 minutes • Cancel anytime
Final Thoughts
Cloudways removes the complexity from cloud hosting while delivering enterprise-grade performance. Whether you’re launching your first blog or migrating a business site, the platform scales with your needs.
The combination of managed services, transparent pricing, and exceptional support makes Cloudways the smart choice for anyone serious about their online presence in 2025.
Next Steps:
- Start your free trial
- Launch a test server
- Join the Cloudways Community for tips
- Explore their knowledge base for advanced features
Questions? Drop them in the comments below or reach out to Cloudways’ 24/7 support team. They’re genuinely helpful!
Disclosure: This guide contains our honest opinions based on extensive testing. We may earn a commission if you sign up through our links, at no extra cost to you. This helps us create more helpful content.


