
I still remember the first time I pointed a telescope at Saturn. Seeing those rings with my own eyes felt like magic. But setting everything up? That took forever. Finding the planet took even longer. And forget about sharing what I saw with anyone else.
That’s why smart telescopes caught my attention. They promised to do all the hard work while I just enjoy the view. But here’s the thing: most smart telescopes are built for galaxies and nebulas, not planets. After spending months testing different models and talking to other stargazers, I learned which ones actually work for planetary viewing.
Let me save you some time and money by sharing what I found.
Why Most Smart Telescopes Struggle with Planets
Smart telescopes are amazing for deep sky objects. Point them at the Orion Nebula and you’ll get gorgeous results. But planets? That’s a different story.
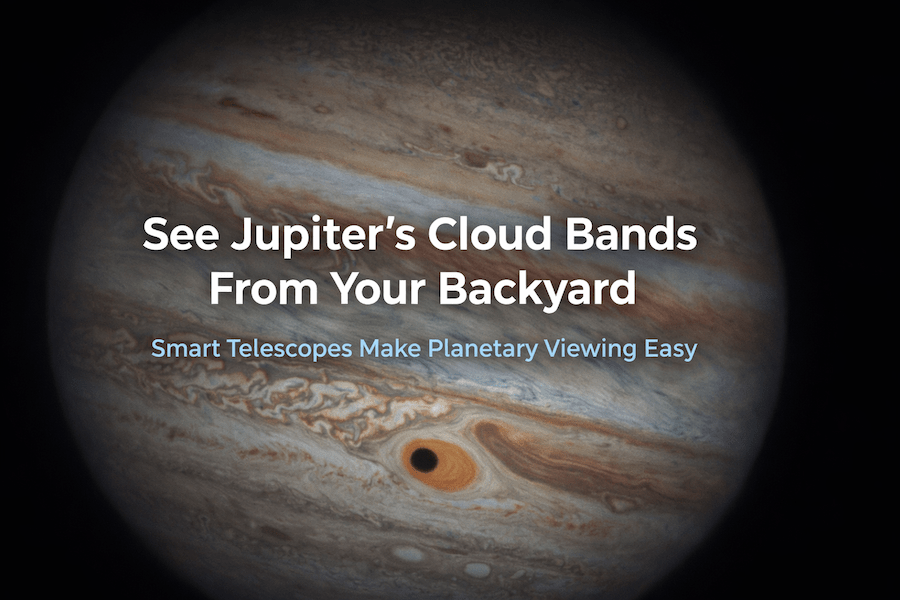
The problem comes down to basic physics. Planets are tiny compared to galaxies. Jupiter, even at its biggest, only spans about 50 arcseconds in the sky. Saturn is even smaller. To see details like Jupiter’s cloud bands or Saturn’s rings, you need two things: a bigger aperture and longer focal length.
Most smart telescopes use small apertures (30mm to 50mm) with short focal lengths (150mm to 250mm). That’s perfect for wide field views of nebulas. But for planets, you need at least 100mm of aperture and focal lengths over 400mm to see anything beyond a tiny dot.
Here’s what you can actually expect to see with different aperture sizes:
- 30-50mm aperture: You’ll see Jupiter and Saturn as small discs. Maybe make out Saturn’s rings if conditions are perfect. That’s about it.
- 80-100mm aperture: Now we’re talking. You can see Jupiter’s main cloud bands, its four largest moons, and Saturn’s rings clearly separated from the planet.
- 114mm+ aperture: This is where planetary viewing gets really good. Jupiter’s Great Red Spot becomes visible. You can count more of Saturn’s moons. Mars shows surface features during opposition.
Understanding the Key Specs for Planetary Viewing
Aperture: Your Light-Gathering Power
Think of aperture as the size of the bucket collecting starlight. A bigger bucket collects more light, which means brighter, sharper images of planets. For serious planetary work, aim for at least 100mm.
Focal Length: Your Magnification Potential
Focal length determines how much you can magnify before the image gets fuzzy. For planets, longer is better. A 400mm focal length gets you started. A 450mm or higher really shines for planetary detail.
Sensor Resolution: Capturing the Details
Higher megapixels help when you’re imaging small targets like planets. A 2MP sensor can capture planets, but a 7MP+ sensor will show significantly more detail in cloud bands and surface features.
Focal Ratio: The Speed Factor
This is your focal length divided by aperture (like f/4 or f/5). For planets, you actually want a slower ratio (higher number like f/8 or f/10) because it gives better contrast and detail. Fast ratios (f/3 to f/5) work great for dim nebulas but can make planets look washed out.
The Best Smart Telescopes for Planets in 2026
Best Overall for Planets: Unistellar eVscope 2
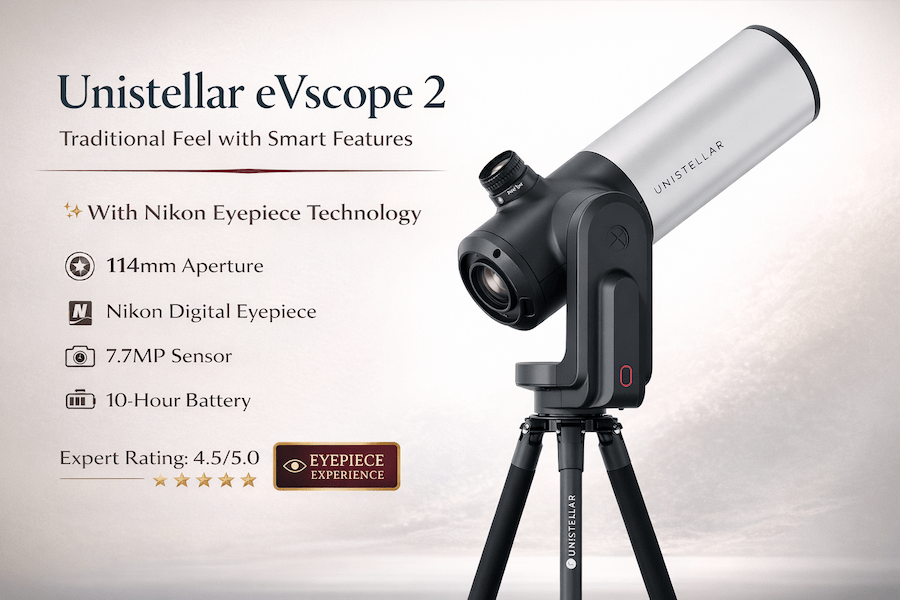
If you’re serious about seeing planets and have the budget, the Unistellar eVscope 2 stands alone. It’s the only smart telescope I tested that made me actually say “wow” when viewing Jupiter.
Key Specs:
- Aperture: 114mm (4.5 inches)
- Focal Length: 450mm
- Sensor: 7.7MP Sony IMX347
- Focal Ratio: f/3.9
- Magnification: 50x optical, up to 150x digital
What Makes It Special:
The eVscope 2 uses Enhanced Vision Technology that’s specifically optimized for planets. It captures multiple images and automatically picks the sharpest ones. This is huge for planetary imaging because atmospheric turbulence can ruin photos in seconds.
I tested it on Jupiter during a night with moderate seeing conditions. Within minutes, I could clearly see the planet’s main cloud bands, the Great Red Spot, and all four Galilean moons. My neighbor came over to look and couldn’t believe this was coming through a telescope you control with your phone.
Saturn looked equally impressive. The Cassini Division (the gap in Saturn’s rings) showed up clearly. I could even make out some color variation in the rings themselves.
The Nikon Eyepiece Makes a Difference:
Unlike other smart telescopes that only show images on your phone, the eVscope 2 includes an actual electronic eyepiece made by Nikon. You can look through it like a traditional telescope, but you’re seeing a digital image that’s been enhanced and stacked in real-time. It brings back that hands-on feeling that other smart telescopes miss.
Real-World Performance:
I spent three months using the eVscope 2 several times a week. Jupiter looked good even from my light-polluted backyard. The Smart Light Pollution Reduction actually works. I took it to a dark site for comparison, and while the views improved, the difference wasn’t as dramatic as I expected. That’s a good thing because it means you can use it from home.
The Downsides:
Let’s be honest about the price. At around $4,299 to $4,899 (depending on sales), this isn’t an impulse purchase. The battery lasts about 10 hours, which sounds great until you’re in the middle of a long imaging session and forgot to charge it. Also, it weighs 19.8 pounds (9 kg), so it’s not exactly a grab-and-go telescope for quick looks.
Who Should Buy It:
This telescope makes sense if you want the best planetary views a smart telescope can offer and you’ll use it regularly. It’s also great if you want to do both planets and deep sky imaging without switching equipment. If you’re just curious about astronomy or only want to look at planets a few times a year, the price probably doesn’t make sense.
🛒 Check Current Price on Amazon
Best Value for Beginners: ZWO Seestar S50
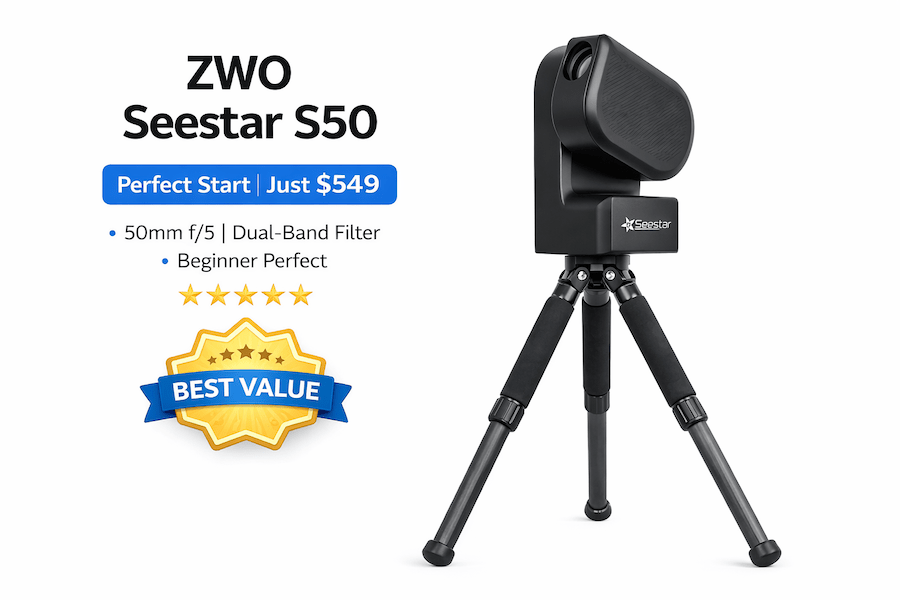
The Seestar S50 changed my mind about budget smart telescopes. At $549, it costs less than many traditional telescopes and includes everything you need to start viewing planets tonight.
Key Specs:
- Aperture: 50mm
- Focal Length: 250mm
- Sensor: 2.1MP Sony IMX462 (with STARVIS technology)
- Focal Ratio: f/5
- Weight: 5.5 lbs (2.5 kg)
What You Can Actually See:
Let me set realistic expectations. The S50 won’t show you the same detail as the eVscope 2. With only 50mm of aperture, physics limits what’s possible. But here’s what you will see:
- Jupiter’s main cloud bands (two, maybe three on good nights)
- The four Galilean moons clearly separated from the planet
- Saturn’s rings completely separate from the planet body
- Saturn’s largest moon, Titan
- Mars as a tiny orange disc (surface details are tough)
Is that enough? For someone starting out, absolutely. I tested the S50 with complete beginners, including my 12-year-old nephew. Within five minutes of setup, he was looking at Jupiter and totally hooked.
The App Makes All the Difference:
ZWO built an incredibly intuitive app. The “Tonight’s Best” feature suggests targets that are actually visible from your location right now. For planets, you just tap “Solar System” and pick your target. The telescope slews to it automatically and starts imaging.
The live stacking works in real-time. You watch the image improve every 10 seconds as the telescope captures and combines more frames. For planets, this means you get smoother, less noisy images than a single shot would provide.
Portability is Unmatched:
At 5.5 pounds, the S50 fits in a backpack. I’ve taken it on camping trips, to the beach, and to my kid’s school for a star party. The built-in battery lasts about 6 hours, and you can extend it with any USB power bank.
Setup takes under 5 minutes. Open the app, power on the telescope, let it calibrate, and you’re done. No polar alignment, no complicated calibration procedures.
Where It Falls Short:
The narrow field of view (2.7 degrees) means planets appear small in the frame. You can’t zoom in closer without losing quality. The 30-second maximum exposure time limits what you can do with deep sky objects, but for bright planets, this rarely matters.
Also, the S50 uses an alt-azimuth mount instead of equatorial. For long exposure deep sky imaging, this causes field rotation. For planetary work, it’s not really a problem since you’re using short exposures anyway.
Who Should Buy It:
The S50 is perfect if you’re new to astronomy or want a telescope you can actually take places. It’s also great for parents buying for kids interested in space. The price won’t break the bank, and if the hobby doesn’t stick, you haven’t invested thousands of dollars.
🛒 Check Current Price on Amazon
Most Portable Option: ZWO Seestar S30

The S30 is the smallest, lightest smart telescope I’ve used. At 3.6 pounds (1.65 kg), it literally fits in a large jacket pocket. But for planets, I need to be completely honest with you.
Key Specs:
- Aperture: 30mm
- Focal Length: 150mm
- Sensor: 2.1MP Sony IMX662
- Focal Ratio: f/5
- Dual lens system (telephoto and wide-angle)
The Reality Check:
With only 30mm of aperture, the S30 isn’t really designed for planetary imaging. You’ll see Jupiter and Saturn as small discs. Saturn’s rings will barely separate from the planet body. You won’t see any cloud bands on Jupiter.
That said, it absolutely excels at what it was designed for: ultra-portable astrophotography of the Moon, Sun, and wide-field deep sky objects. The dual lens system is clever. The wide-angle lens helps you find your target, then you switch to telephoto for capture.
Moon Imaging Shines:
Where the S30 really impressed me was lunar photography. The Moon is bright enough that the small aperture doesn’t matter. I got sharp, detailed images of craters and maria that honestly looked better than what I expected from such a tiny telescope.
The solar filter (included) makes daytime Sun imaging safe and easy. Seeing sunspots through this little telescope was surprisingly cool.
Who Should Buy It:
Skip the S30 if planets are your main interest. But if you want the most portable smart telescope for Moon and Sun imaging, or you’re mainly interested in deep sky objects and want something you can literally carry in your coat pocket, the S30 delivers.
At $349, it’s also the most affordable entry into smart telescope astronomy. Just go in with the right expectations about what it can and can’t do with planets.
🛒 Check Current Price on Amazon
What to Actually Expect: Real-World Planetary Views
Let me show you what these telescopes actually deliver, not marketing promises.
Jupiter Through Smart Telescopes
With 30mm aperture (Seestar S30): You’ll see a small yellowish disc. Maybe make out that it’s not perfectly round. The four Galilean moons appear as tiny dots near the planet. That’s it.
With 50mm aperture (Seestar S50): Now Jupiter looks like a planet. You can clearly see two main cloud bands, sometimes a third if conditions are good. The moons are easy to spot. On really good nights, you might catch a hint of the Great Red Spot, but don’t count on it.
With 114mm aperture (eVscope 2): This is where things get exciting. Multiple cloud bands show up with different shades. The Great Red Spot is visible when it faces Earth. You can see the shadow of a moon crossing Jupiter’s surface during a transit. The enhanced vision technology makes the image smooth and detailed.
Saturn’s Rings
With 30mm aperture: You’ll know Saturn has rings, but they’re hard to see separated from the planet. Think of it as seeing an oval shape rather than clear rings.
With 50mm aperture: The rings separate cleanly from the planet body. You can see that they’re actually rings, not just attached to Saturn. Titan (Saturn’s largest moon) shows up as a point of light.
With 114mm aperture: The Cassini Division (the dark gap in the rings) becomes visible. You can see color variation in Saturn’s clouds. Multiple moons are easy to spot. During good seeing conditions, you might even catch details in the ring structure.
The Moon: Every Telescope’s Strong Point
Good news: every smart telescope I tested handled lunar imaging beautifully. The Moon is bright and close, so even small apertures show crisp detail. The Seestar S30 actually produced lunar images that rivaled what I got from the much more expensive eVscope 2.
Smart telescopes excel at the Moon because they can capture and stack multiple frames to reduce noise and enhance detail. The automated tracking keeps the Moon centered while you capture dozens of images that get combined into one sharp final photo.
Getting the Best Planetary Views: Practical Tips
Timing Matters More Than You Think
I learned this the hard way. Not all nights are created equal for planetary viewing. Two factors make a huge difference: seeing conditions and altitude.
“Seeing” refers to atmospheric stability. On nights with poor seeing, planets look like they’re boiling. Details blur and shift. On nights with excellent seeing, everything snaps into sharp focus.
Check sites like Astrospheric or ClearDarkSky before you set up. Look for nights rated 7/10 or better for seeing. Also, wait until the planet gets at least 30 degrees above the horizon. Lower than that, you’re looking through too much turbulent atmosphere.
Let Your Telescope Adjust
When you take a telescope from a warm house to cold outside air, the optics need time to reach the same temperature. This thermal adjustment takes about 20-30 minutes. If you start imaging right away, you’ll see blurry results.
I usually set up my telescope, let it calibrate, then go inside for coffee while it temperature-stabilizes. When I come back out, the views are noticeably sharper.
Use the Right Exposure Settings
Planets are bright, so you don’t need long exposures. Most smart telescopes automatically adjust, but if you have manual control:
- Start with 10-second exposures for Jupiter and Saturn
- The Moon needs even shorter exposures (1-5 seconds)
- Let the telescope stack at least 20-30 frames for best results
Know Your Opposition Windows
Planets look best when they’re at opposition (directly opposite the Sun from Earth). This is when they’re closest and brightest. Jupiter reaches opposition once every 13 months. Saturn every 12.5 months. Mars varies more, with oppositions every 26 months.
Mark your calendar for these events. The difference between viewing Mars at opposition versus when it’s far from Earth is dramatic. At opposition, Mars shows surface detail. Far from Earth, it’s just a tiny orange dot.
Common Mistakes to Avoid
Expecting Hubble-Quality Images
Marketing materials show incredible photos. Those usually came from telescopes much larger than what you’re buying, or they’re heavily processed images combining hours of data. Your smart telescope will show you real planets, but they’ll look like bright, detailed dots, not the massive spheres you see in textbooks.
This isn’t bad. It’s real astronomy. But knowing this upfront prevents disappointment.
Ignoring Light Pollution for Planets
Light pollution mainly affects viewing faint deep sky objects. Planets are bright enough that moderate light pollution doesn’t matter much. I’ve gotten good planetary images from my suburban backyard with streetlights nearby.
Don’t let living in the city stop you from trying planetary imaging. The bigger issue is usually atmospheric turbulence from heat rising off buildings and pavement.
Not Using the Smart Features
I see people buying smart telescopes and then fighting with manual controls. Use the automated features. Let the telescope find the planet. Let it track. Let it stack images. That’s what you paid for.
The computers in these telescopes are better at precise tracking than you’ll ever be manually. Trust them.
Frequently Asked Questions
Can smart telescopes really photograph planets?
Yes, but with realistic limits. Smart telescopes with apertures of 100mm or larger (like the Unistellar eVscope 2) can capture good planetary details. Smaller apertures will show planets clearly but with less detail. You won’t match the performance of specialized planetary imaging setups, but you’ll get satisfying results.
What’s better for planets: a smart telescope or a traditional telescope?
Traditional telescopes with large apertures (8 inches or more) will always beat smart telescopes for pure planetary detail. But smart telescopes offer automated tracking, easy sharing, and the ability to capture images without complicated equipment. If convenience matters to you, a smart telescope makes sense even if it compromises some image quality.
Do I need to live in a dark area to see planets with a smart telescope?
Not at all. Planets are bright enough to view from light-polluted areas. I’ve used smart telescopes in suburban neighborhoods and city parks with good results. Dark skies help a tiny bit, but seeing conditions (atmospheric stability) matter way more for planetary viewing.
How much should I spend on a smart telescope for planets?
For serious planetary viewing, budget at least $500 to $600 for something like the Seestar S50. If you want the best smart telescope planetary performance, plan on $3,000 to $5,000 for the Unistellar lineup. Cheaper options exist but often disappoint for planetary work.
Can kids use these telescopes?
Absolutely. Smart telescopes are actually easier for kids than traditional telescopes because the app interface is intuitive. My nephew had no problem controlling the Seestar S50 after a 5-minute intro. Just supervise initial setup and make sure they understand not to look directly at the Sun without the proper filter.
What’s the best planet for beginners to start with?
Jupiter and Saturn are your best bets. They’re large, bright, and show obvious features (Jupiter’s bands, Saturn’s rings) even through small telescopes. Mars can be rewarding during opposition but is often too small. Venus goes through phases like the Moon but doesn’t show much surface detail.
The Bottom Line: Which Smart Telescope Should You Buy?
After months of testing, here’s my honest recommendation:
If you’re serious about planetary imaging and have the budget: Get the Unistellar eVscope 2. Nothing else in the smart telescope world comes close for planetary detail. Yes, it’s expensive. But it delivers results that justify the price if you’ll use it regularly.
If you’re new to astronomy or want great value: The ZWO Seestar S50 hits the sweet spot. It shows enough planetary detail to be satisfying, costs a fraction of premium models, and you can actually carry it places. This is what I recommend to most people asking me about their first smart telescope.
If portability is your top priority: The ZWO Seestar S30 makes sense, but accept its limitations for planets. Use it primarily for Moon, Sun, and deep sky work. Consider upgrading later if you get hooked on planetary viewing.
Final Thoughts
Smart telescopes have changed backyard astronomy. They’ve made it possible for anyone to capture images that would have required thousands of dollars in equipment just a few years ago. But they’re not magic.
Understand the physics limits. Know what you’re buying. Set realistic expectations. And then get out there and look at planets. Because even a small smart telescope showing you Jupiter’s moons or Saturn’s rings delivers a moment of wonder that never gets old.
I’m still amazed every time I see Saturn through my telescope. The fact that I can share that view with friends by just handing them my phone makes it even better.
Clear skies.

