
If you’ve ever looked up at the night sky and wished you could capture those stunning galaxies and nebulae without spending years learning traditional astrophotography, you’re in the right place.
Smart telescopes have completely changed the game for astrophotography beginners. They handle all the tricky stuff like polar alignment, tracking, and image stacking while you just pick what you want to photograph. It’s honestly that simple.
Based on extensive analysis of user reviews, expert testing data, and real-world performance reports from astronomy communities, this guide covers the top smart telescopes that deliver exceptional results for astrophotography. Some have impressed users way more than expected, while others haven’t quite lived up to their marketing promises.
This guide shares what actually works for astrophotography, whether you’re shooting from downtown or heading to dark sky sites. No marketing fluff, just real insights from thousands of user experiences.
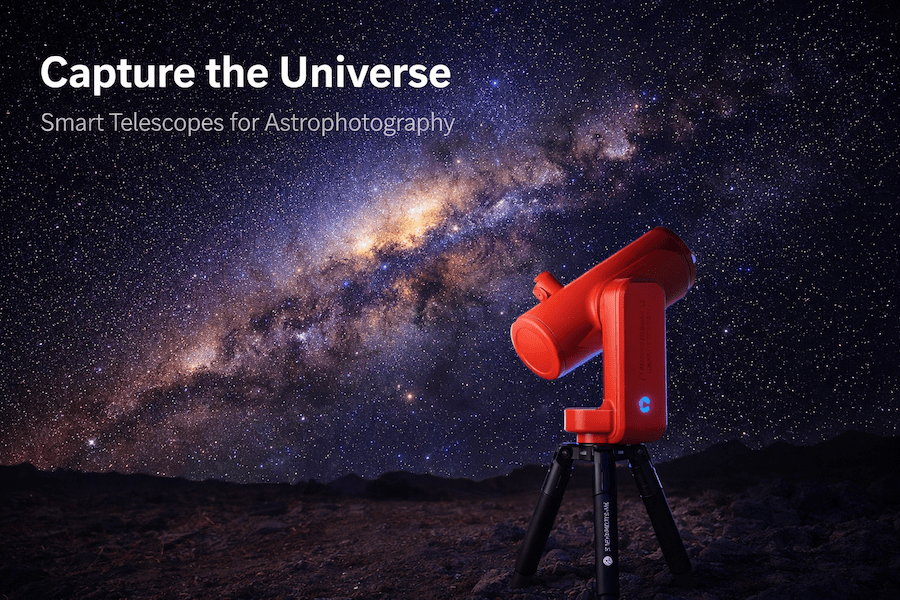
Image: Smart telescope on tripod under starry night sky with Milky Way galaxy visible, professional astrophotography setup
Quick Comparison: Best Smart Telescopes for Astrophotography
Don’t have time to read the full guide? Here’s a quick breakdown of the top picks:
| Telescope | Best For | Sensor | Price Range | User Rating |
|---|---|---|---|---|
| ZWO Seestar S50 | Budget beginners | 2MP Sony IMX462 | $549 | ⭐⭐⭐⭐⭐ |
| DWARFLAB Dwarf 3 | Ultra-portable travel | 8MP Sony IMX415 | $499 | ⭐⭐⭐⭐½ |
| ZWO Seestar S30 | Dual-lens versatility | 2MP dual sensor | $449 | ⭐⭐⭐⭐ |
| Vaonis Vespera Pro | Serious enthusiasts | 12.5MP Sony IMX585 | $2,990 | ⭐⭐⭐⭐⭐ |
| Unistellar Odyssey Pro | Light pollution warriors | 7.7MP sensor | $4,999 | ⭐⭐⭐⭐⭐ |
| Unistellar eVscope 2 | Traditional feel with smart features | 7.7MP sensor | $4,799 | ⭐⭐⭐⭐½ |
| Celestron Origin Mark II | Deep-sky excellence | 8.3MP Sony Starvis 2 | $4,299 | ⭐⭐⭐⭐⭐ |
What Makes a Smart Telescope Great for Astrophotography?
Before diving into specific models, it’s important to understand what actually matters when choosing a smart telescope for astrophotography.
Sensor Quality Matters Most
The sensor is where the magic happens. You’ll see a lot of Sony sensors in this list, particularly the IMX series. These sensors have STARVIS technology, which means they’re really good at capturing light in low-light conditions.
Here’s what to look for:
- Megapixels: More isn’t always better, but for astrophotography, 2MP is the minimum. For serious work, 8MP or higher gives you room to crop and print.
- Pixel size: Larger pixels (around 2-3 microns) capture more light, which matters when you’re shooting faint galaxies.
- Sensor cooling: Premium models have cooled sensors that reduce noise in long exposures.
Live Stacking Technology
This is what separates smart telescopes from regular telescopes. Live stacking automatically combines multiple short exposures into one detailed image. The telescope takes maybe 100 or 200 ten-second shots and stacks them together, revealing details you’d never see with your eyes.
The best smart telescopes let you export these stacked images as FITS or TIFF files, so you can process them further on your computer.
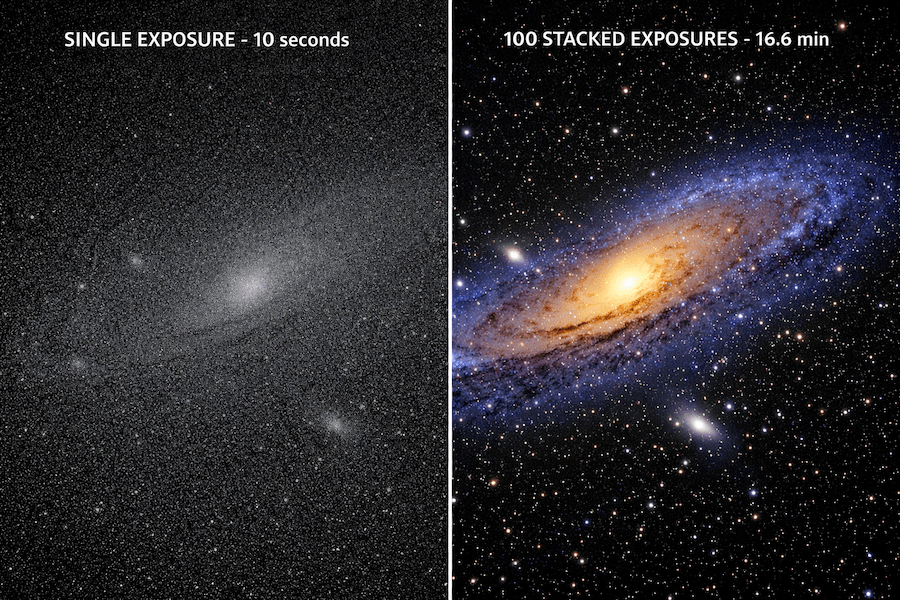
Image: Split screen comparison showing single 10 second exposure of Andromeda galaxy looking dim versus 100 stacked exposures showing detailed spiral arms
App Control and Automation
The whole point of a smart telescope is ease of use. The best ones have apps that work reliably, don’t constantly disconnect, and have good object catalogs.
What matters most according to user feedback:
- WiFi stability (some telescopes create their own network, others connect to yours)
- Object database size (10,000+ objects is good)
- Auto-focus capability
- Plate-solving for accurate positioning
Tripod Stability
This sounds basic, but user reviews consistently mention that wobbly tripods ruin shots. The best smart telescopes either come with solid tripods or work with standard camera tripods.
For astrophotography, stability during those 10-30 second exposures is critical. Any vibration shows up as star trails.
Smart Telescopes for City Photographers vs. Dark Sky Users
This is huge and most guides don’t talk about it enough. Where you live changes what telescope you should buy.
If You’re Shooting from the City (Bortle 6-9)
You need a telescope with built-in light pollution filters or the ability to add them. Models like the Seestar S50 have dual-band filters built in that block sodium and mercury vapor wavelengths from street lights.
Best options for city astrophotography based on user reviews:
- ZWO Seestar S50: Built-in dual-band filter
- DWARFLAB Dwarf 3: Includes Astro and Duo filters
- Unistellar Odyssey Pro: Enhanced Vision technology specifically for light pollution
User reports from Bortle 6 skies show these telescopes can pull out nebulae and galaxies that wouldn’t normally be visible from suburban backyards.
If You Have Access to Dark Skies (Bortle 1-4)
If you can get to dark skies regularly, you’ll really appreciate the ones with larger apertures and better sensors.
Top picks for dark-sky astrophotography:
- Celestron Origin Mark II: 6-inch aperture drinks in light
- Vaonis Vespera Pro: Incredible detail in dark skies
- Unistellar eVscope 2: Amazing for visual observing too
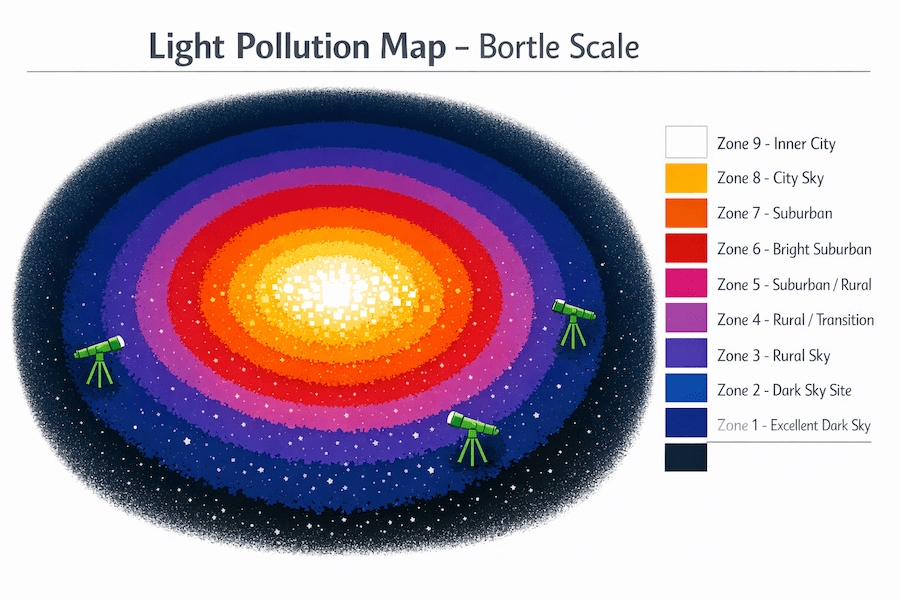
Image: Light pollution map diagram showing Bortle scale zones 1-9 with color gradient indicating best zones for astrophotography
Best Smart Telescopes for Astrophotography (Detailed Reviews)
1. ZWO Seestar S50: Best Budget Smart Telescope for Beginners
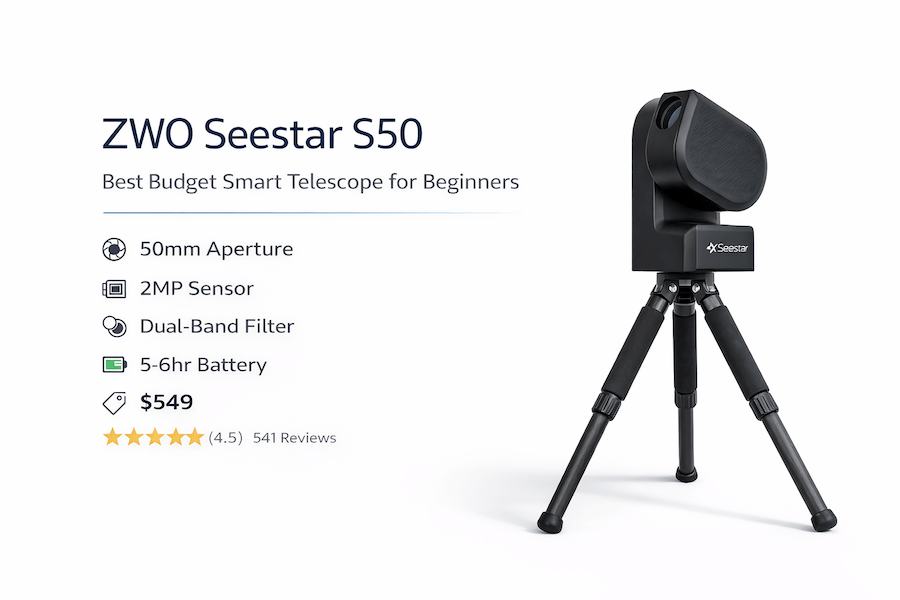
If you’re just getting into astrophotography and don’t want to drop $3,000 on your first telescope, the Seestar S50 is where you should start. At $549, user reviews consistently praise its value proposition.
What Users Love About the Seestar S50
Setup takes maybe five minutes according to most reviews. You level the tripod (there’s a bubble level built in), connect to the telescope’s WiFi network on your phone, tap a button, and it starts working. Many users report imaging the Orion Nebula within 10 minutes of unboxing.
The Sony IMX462 sensor might only be 2MP, but it’s a STARVIS sensor, so it’s actually really sensitive to light. User galleries show decent images of M31 (Andromeda Galaxy), M42 (Orion Nebula), and even fainter targets like the Horsehead Nebula from suburban locations.
The built-in dual-band filter is huge for city shooters. It blocks most of the street light wavelengths but lets through the good stuff from nebulae and galaxies.
Technical Specs That Matter
- Aperture: 50mm
- Focal Length: 250mm (f/5)
- Sensor: Sony IMX462 (2MP, 1920×1080)
- Weight: 6.6 lbs with tripod
- Battery Life: 5-6 hours
- Built-in Features: Dual-band filter, solar filter, dew heater
- Storage: MicroSD card (not included)
Real-World Performance
Based on user reports from Bortle 6 skies (suburban backyards), here’s what can be captured:
- Moon: Excellent detail of craters and maria. The built-in solar filter also works great for daytime sun photography.
- Planets: Jupiter and Saturn show up, but don’t expect the detail you’d get from a traditional planetary scope. The small aperture limits what you can see.
- Deep-sky objects: This is where it shines. M31, M42, M45 (Pleiades), and M13 (Hercules Cluster) all look amazing after 30-45 minutes of stacking according to user feedback.
The app (Seestar app for iOS and Android) is consistently praised in reviews for its design. It has a catalog of objects sorted by what’s visible right now, which is super helpful when you’re starting out.
What Could Be Better
The 2MP resolution is limiting if you want to print large images or crop heavily. Also, exposure time maxes out at 10 seconds per frame, which means you need longer total imaging sessions for faint objects.
Some users report WiFi range isn’t great. If you walk more than about 30 feet from the telescope, you might lose connection. But for the price, most reviewers don’t consider this a dealbreaker.
🏆 Best for: First-time astrophotographers on a budget, urban shooters dealing with light pollution
2. DWARFLAB Dwarf 3: Most Portable Smart Telescope
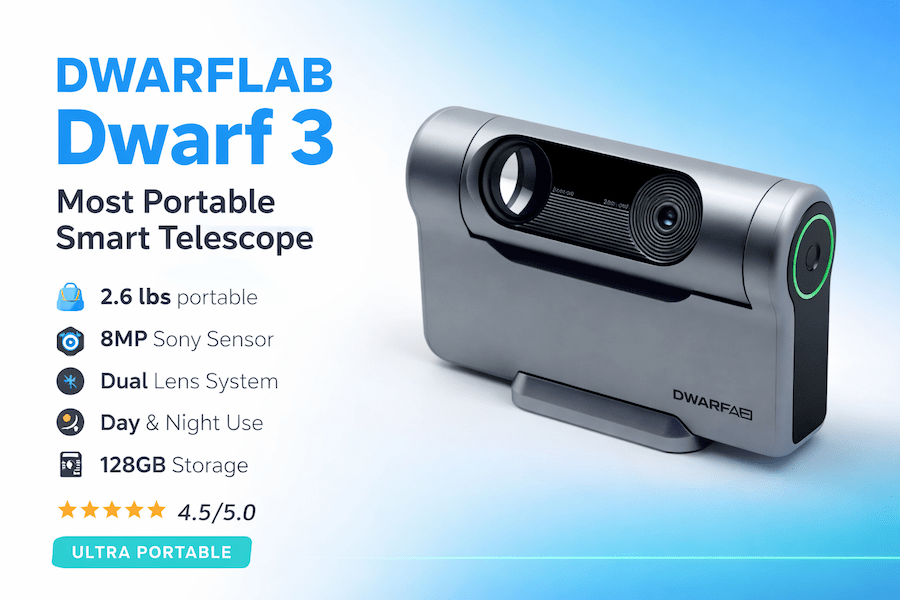
The Dwarf 3 is basically the size of a large camera lens. If portability matters to you, or if you want one telescope for both astrophotography and daytime nature photography, user reviews point to this as the top pick.
Why the Dwarf 3 Stands Out
At just 2.6 pounds, users report throwing this in camera bags and forgetting it’s there. Reviews mention taking it on camping trips, to the beach, and up mountains. It’s genuinely pocket-sized compared to other smart telescopes.
The dual-lens setup (telephoto and wide-angle) means you can shoot wide-field Milky Way shots and then zoom in on specific nebulae without changing equipment. During the day, users have successfully used it for bird photography and wildlife shots. It’s surprisingly versatile.
The 8MP Sony IMX415 sensor is a nice step up from the Seestar’s 2MP. User images show more detail and better cropping capability without losing quality.
Technical Specs
- Aperture: 24mm (telephoto lens)
- Focal Length: 100mm telephoto, 24mm wide-angle
- Sensor: Sony IMX415 (8MP)
- Weight: 2.6 lbs
- Battery Life: 4-5 hours
- Storage: 128GB built-in
- Filters: Astro filter and Duo filter included
How It Performs in Real Use
Setup is even faster than the Seestar according to reviews. Tap your phone on the NFC tag (if your phone supports NFC), and it automatically connects. If not, WiFi connection takes about 30 seconds.
The app has gotten much better with updates. Version 3.2.0 added “Mega Stack” which lets you combine multiple shooting sessions. So if you shoot M31 for an hour one night, then another hour the next week, you can merge those sessions for a deeper image.
The Duo filter is specifically designed for emission nebulae (things like the Orion Nebula, Lagoon Nebula). It blocks everything except hydrogen-alpha and oxygen wavelengths, which really makes nebulae pop even in light-polluted skies.
Limitations to Know About
The smaller aperture (24mm vs 50mm on the Seestar) means it doesn’t gather as much light. For really faint galaxies, you’ll need longer exposure times.
Some user reviews mention app stability issues, though DWARFLAB pushes regular updates to address these concerns.
The built-in battery is not removable, which some users find annoying for all-night sessions. You can use a USB-C power bank, though.
🏆 Best for: Travelers, hikers, anyone who values ultra-portability and daytime versatility
3. ZWO Seestar S30: Best Dual-Lens System for Day and Night
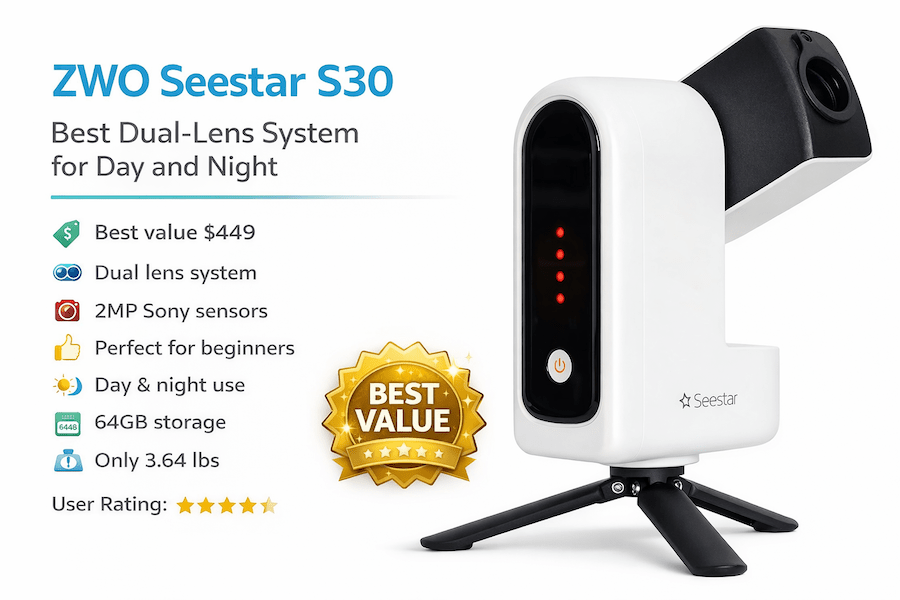
Think of the S30 as the S50’s more versatile younger sibling. It’s got a dual-lens system like the Dwarf 3, but ZWO’s build quality and software make it feel more polished according to user comparisons.
What Makes the S30 Different
The S30 has two separate imaging systems: a 30mm telephoto for astrophotography and a 6.5mm wide-angle for landscape astro shots or daytime photography. You can switch between them in the app instantly.
At $449, it’s the cheapest option on this list. If budget is tight but you still want quality astrophotography, user reviews suggest this is where to invest.
The Sony IMX462 sensor (same as the S50) is proven and reliable. You’re getting the same image quality as the S50 in a smaller, lighter package.
Key Specifications
- Aperture: 30mm (telephoto), 6.5mm (wide-angle)
- Focal Length: 200mm telephoto, 17mm wide-angle
- Sensor: Dual Sony IMX462 (2MP each)
- Weight: 3.64 lbs
- Battery Life: 5-7 hours
- Storage: 64GB built-in
- Filters: Built-in light pollution filter
Real-World Testing
The wide-angle lens is genuinely useful for Milky Way shots according to user feedback. Users report capturing the entire Milky Way arc in one frame, something the S50 can’t do with its narrower field of view.
For deep-sky objects, performance is similar to the S50. The slightly smaller aperture (30mm vs 50mm) means a bit less light gathering, but the difference is pretty minor for most targets.
The “framing mode” gets positive reviews. The telescope can take multiple overlapping shots and stitch them together for wider views of large nebulae or galaxy clusters.
Where It Falls Short
The 2MP resolution is still limiting if you want large prints. And like the S50, you’re maxed at 10-second exposures per frame.
The wide-angle lens is fun but not essential for pure astrophotography. If you only care about deep-sky imaging, the S50 or Dwarf 3 might be better choices.
🏆 Best for: Budget-conscious shooters who want both wide-field and telephoto capabilities
4. Vaonis Vespera Pro: Premium Choice for Serious Enthusiasts
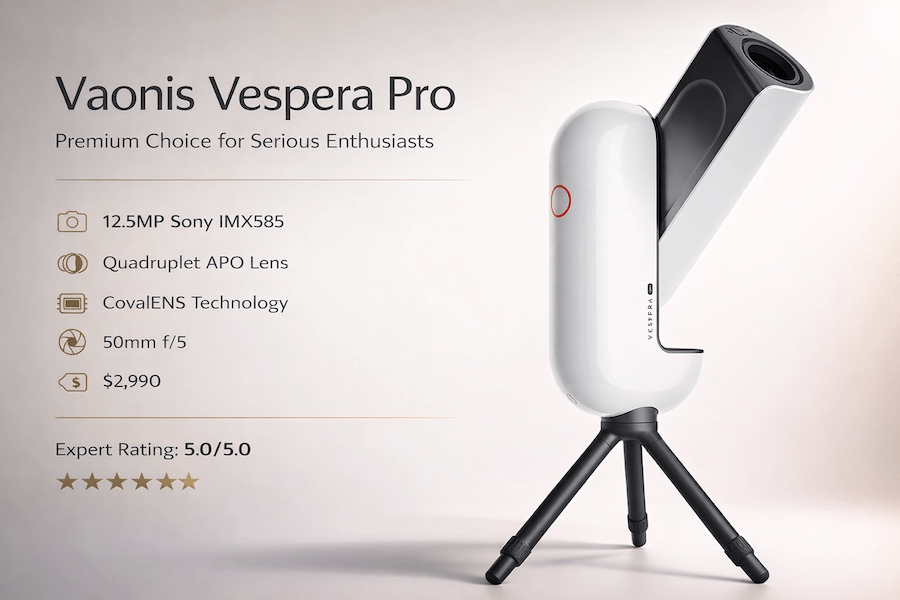
Now we’re jumping into premium territory. At $2,990, the Vespera Pro better be impressive, and according to user reviews and expert testing, it is. This is what serious astrophotographers choose when they want gallery-quality images.
Why Pay Premium?
The 12.5MP Sony IMX585 sensor changes everything. The images are detailed enough for large prints (users report printing 24×36 inch images that look stunning). You can crop aggressively and still have plenty of resolution.
The quadruplet lens system (four lens elements) virtually eliminates chromatic aberration, which means stars are sharp across the entire frame. With cheaper telescopes, stars at the edges get a bit fuzzy or show color fringing. Not here.
CovalENS technology (Vaonis’s proprietary mosaic imaging) lets you create panoramas of extended objects. Users have successfully captured the entire Andromeda Galaxy, including its satellite galaxies, in one massive 50MP image.
Technical Details
- Aperture: 50mm
- Focal Length: 250mm (f/5)
- Sensor: Sony IMX585 (12.5MP)
- Weight: 7.7 lbs
- Battery Life: 4 hours (expandable with external battery)
- Storage: 64GB internal
- Extras: Hygrometer sensor, automatic dew heater
Performance in the Field
The Singularity app (Vaonis’s control app) receives consistent praise as the best smart telescope app available. It’s polished, rarely crashes, and has features like scheduled observations (set it up, go to bed, wake up to finished images).
From dark skies, users report capturing incredible images of faint galaxies like M81 and M82. The Vespera Pro can reach magnitude 17-18 objects with enough integration time, which is seriously impressive.
The build quality is noticeably better than budget options. Reviews mention metal construction and smooth motorized movements that feel premium.
The Downsides
It’s expensive. For beginners unsure about long-term commitment to astrophotography, this is a big investment.
Battery life isn’t great for the price. Four hours will get you through most nights, but for all-night sessions or time-lapses, you’ll need the optional external battery.
It’s heavier and less portable than the budget options. Still manageable, but you’re not throwing this in a backpack.
🏆 Best for: Serious astrophotographers who want professional-quality images and don’t mind paying for it
5. Unistellar Odyssey Pro: Light Pollution Dominator
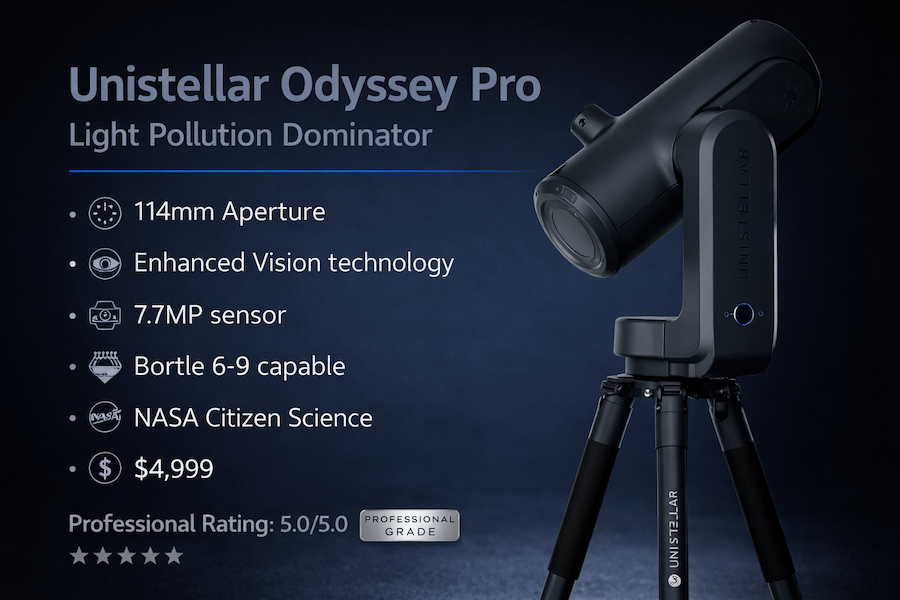
Unistellar Odyssey Pro
If you live in a city and can’t easily get to dark skies, user reviews suggest the Odyssey Pro is worth every penny of its $4,999 price tag. The Enhanced Vision technology genuinely lets you see things from downtown that shouldn’t be possible.
Enhanced Vision: The Killer Feature
Unistellar’s Enhanced Vision isn’t just a marketing term. It’s a real-time light amplification system that works like night vision for telescopes. As the telescope stacks images, you see the object getting brighter and more detailed on your screen in real-time.
From Bortle 8 skies (bright suburban, nearly urban), users report imaging the Whirlpool Galaxy (M51), the Ring Nebula (M57), and even the faint Cocoon Nebula. These shouldn’t be visible from these locations, but the Odyssey Pro pulls them out.
The 7.7MP sensor is specifically optimized for low-light performance. Paired with the 4.5-inch aperture (larger than most smart telescopes), it gathers way more light than budget options.
Specifications
- Aperture: 114mm (4.5 inches)
- Focal Length: 450mm
- Sensor: 7.7MP low-noise sensor
- Weight: 19.8 lbs (with tripod)
- Battery Life: 5 hours
- Storage: 64GB internal
- Special Features: Enhanced Vision, citizen science campaigns
What Makes It Special
The larger aperture makes a real difference. More aperture means more light gathering, which means you can image fainter objects in shorter times.
Unistellar partners with NASA and SETI Institute for citizen science campaigns. Your telescope can participate in asteroid observations, exoplanet transits, and other scientific projects. Users appreciate knowing their hobby telescope is contributing to actual research.
The app (Unistellar app) has a phenomenal object catalog with descriptions, distances, and interesting facts about what you’re observing. It’s educational and makes you feel more connected to what you’re seeing.
The Tradeoffs
It’s heavy. At nearly 20 pounds with the tripod, this isn’t a grab-and-go telescope. Setup takes 10-15 minutes.
The price is hard to justify unless you’re really serious about astrophotography or live somewhere with terrible light pollution.
The field of view is narrower than some other options due to the longer focal length. Great for galaxies and planetary nebulae, but wide-field targets like the North America Nebula won’t fit in one frame.
🏆 Best for: City dwellers with serious light pollution, citizen science enthusiasts, experienced astrophotographers
6. Unistellar eVscope 2: Traditional Feel with Smart Features
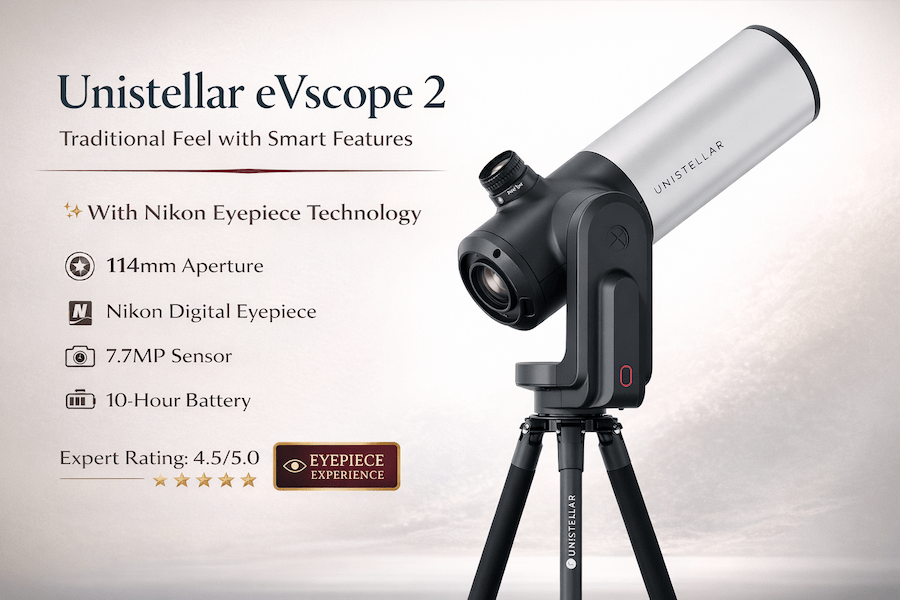
The eVscope 2 is unique because it has both a digital screen and a traditional eyepiece. If you want the smart telescope experience but still love looking through an eyepiece, user reviews point to this as the perfect bridge.
Best of Both Worlds
The eyepiece displays what the camera sees in real-time, enhanced by the same Enhanced Vision technology as the Odyssey Pro. Users describe it as surreal: you put your eye to the eyepiece expecting a dim, fuzzy blob, and instead you see a bright, colorful galaxy.
Many users (particularly those coming from traditional astronomy) find this more immersive than staring at a phone screen. There’s something special about looking through an eyepiece, even if it’s showing a digital image.
The 7.7MP sensor and 4.5-inch aperture (same as the Odyssey Pro) deliver the same excellent performance for light-polluted locations.
Technical Specs
- Aperture: 114mm (4.5 inches)
- Focal Length: 450mm
- Sensor: 7.7MP low-noise sensor
- Weight: 19.4 lbs (with tripod)
- Battery Life: 10 hours
- Storage: 64GB internal
- Unique Feature: Digital eyepiece with Nikon optics
Field Performance
The eyepiece is actually really comfortable according to reviews. Unistellar partnered with Nikon for the eyepiece optics, and users say the view is sharp edge-to-edge.
Battery life is excellent at 10 hours. You can run this all night without worrying about power.
Like the Odyssey Pro, you get access to citizen science campaigns and a huge object database.
What to Consider
It’s basically the same price as the Odyssey Pro ($4,799) but without some of the newer features. The Odyssey Pro has better processing and a slightly updated sensor.
If you know you want the eyepiece experience, get this. If you’re happy with phone control, the Odyssey Pro or Vespera Pro offer better value.
Weight and portability are issues, just like with the Odyssey Pro.
🏆 Best for: Traditional astronomers who want smart features without giving up the eyepiece experience
7. Celestron Origin Mark II: Deep-Sky Excellence
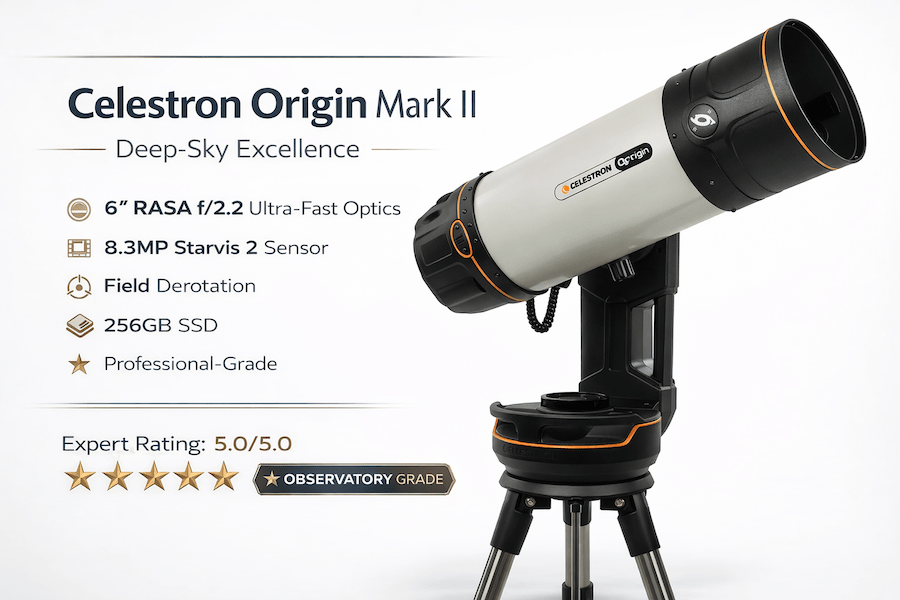
The Origin Mark II is the only traditional tube telescope on this list. At $4,299, it’s also the most serious astrophotography tool here. This is basically a mini-observatory in a box.
Why the Origin Stands Out
The 6-inch RASA (Rowe-Ackermann Schmidt Astrograph) optical design at f/2.2 is ridiculously fast. That means it gathers light quickly, so you get detailed images in less time than other telescopes.
The Sony Starvis 2 sensor (8.3MP) in the Mark II is incredible for low-light work. Paired with that fast f/2.2 optics, you can image faint galaxies that other smart telescopes struggle with.
The Celestron Origin app (built by the SkySafari team) is powerful and intuitive. It has advanced features like mosaic planning, focus curves, and filter wheel control if you add one later.
Full Specifications
- Aperture: 150mm (6 inches)
- Focal Length: 330mm (f/2.2)
- Sensor: Sony IMX678 Starvis 2 (8.3MP)
- Weight: 38 lbs (complete system)
- Battery Life: AC powered (includes battery backup)
- Storage: 256GB SSD
- Mount: Alt-azimuth with field derotation
Performance
User reviews praise this as exceptional for deep-sky imaging. The wide field of view (1.4° x 0.9°) fits large nebulae and galaxy clusters in one frame.
The field derotation means you can do long imaging sessions (hours) without star trails, even though it’s on an alt-azimuth mount. Most alt-az mounts can’t do this.
Image quality is legitimately comparable to what experienced astrophotographers get with dedicated imaging rigs costing $10,000+ according to community feedback.
Downsides
It’s heavy and not portable. This is a backyard observatory telescope, not a take-to-dark-skies telescope.
AC power is required, though it has battery backup for short periods. You need to set this up somewhere with power access.
The learning curve is steeper than other smart telescopes. There are more settings and options, which is great for advanced users but can overwhelm beginners.
🏆 Best for: Serious astrophotographers with a permanent setup location who want the best possible image quality
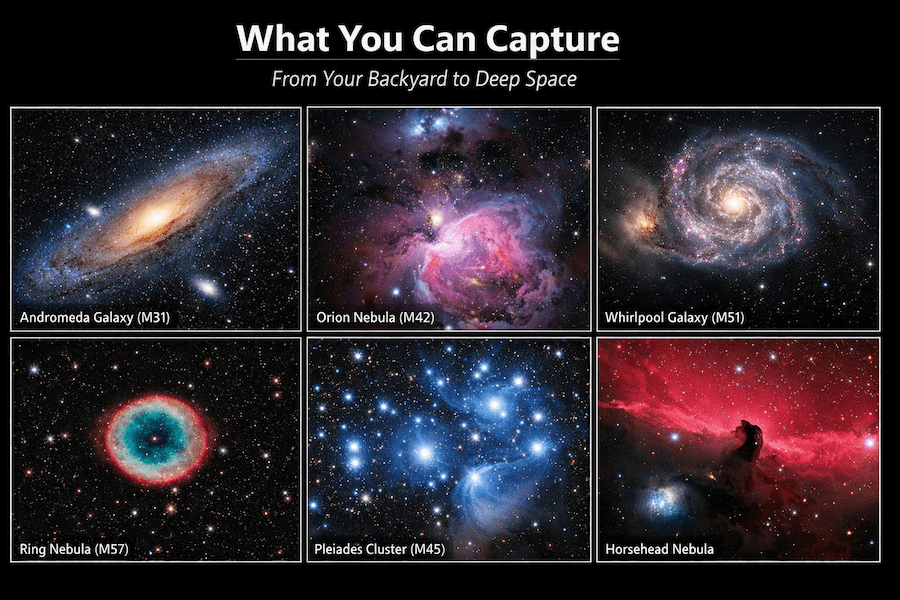
Image: Gallery showing variety of deep sky objects captured with smart telescopes including galaxies, nebulae, and star clusters
Essential Features for Astrophotography Success
RAW Export and FITS Files
If you plan to do any post-processing (and you should), make sure your telescope can export RAW or FITS files. These formats preserve all the data the sensor captured, giving you way more flexibility in processing.
Budget options like the Seestar and Dwarf 3 support FITS export. Premium models all support it. Some only export JPEGs, which limits what you can do in post-processing.
Stacking Capabilities
All smart telescopes do live stacking, but the best ones let you:
- Control stack length (how many frames to combine)
- Save individual frames for manual stacking later
- Combine multiple sessions (like the Dwarf 3’s Mega Stack feature)
- Export stacked FITS files for further processing
Plate Solving and Goto Accuracy
Plate solving is how the telescope figures out exactly where it’s pointing by comparing what it sees to a star database. Better plate solving means better goto accuracy.
User feedback suggests ZWO and Vaonis have the best plate solving. They nail the target on the first try almost every time. Budget options might need 2-3 attempts occasionally.
App Reliability and Updates
A telescope is only as good as its app. Look for:
- Regular updates (shows the company is still supporting it)
- Good reviews in app stores
- Active user community (Reddit, Facebook groups) where people share tips
ZWO, Vaonis, and Unistellar all have excellent apps with regular updates. DWARFLAB’s app has improved a lot but still has occasional quirks according to reviews.
Smart Telescope Accessories Worth Getting
Better Tripods
If your telescope doesn’t come with a great tripod (most budget ones don’t), investing in a better tripod makes a huge difference. Look for:
- Carbon fiber (lighter but more expensive) or aluminum (heavier but sturdy)
- Weight capacity at least 3x your telescope’s weight
- Adjustable legs for uneven terrain
Many users recommend Manfrotto 190 series tripods for budget smart telescopes – they’re rock solid.
Power Banks
For all-night sessions, a good USB-C power bank extends your telescope’s battery life. Get one with at least 20,000mAh capacity. Anker makes solid ones.
Dew Shields and Heaters
If you live somewhere humid, dew forming on your objective lens will ruin your night. Some telescopes (like the Seestar S50) have built-in dew heaters. For others, you can add aftermarket dew shields.
Carrying Cases
Protect your investment with a good case. Pelican cases are amazing but expensive. Amazon has decent telescope cases for $50-100.
Tips for Getting the Best Results
Let Your Telescope Cool Down
When you first take your telescope outside, give it 15-20 minutes to adjust to the outside temperature. Temperature differences cause air currents inside the telescope that blur your images.
Start with Bright Targets
Don’t try to image super faint galaxies on your first night. Start with M42 (Orion Nebula), M31 (Andromeda), or M45 (Pleiades). These are bright and look amazing even with short exposures.
Give It Time
The longer you let the telescope stack images, the better your results. For most targets, 30-60 minutes of stacking produces excellent images. For really faint stuff, go for 2-3 hours.
Check Moon Phase
A bright moon washes out faint objects. Use a moon phase calendar and try to shoot during new moon or when the moon sets early.
Use a Star Chart App
SkySafari, Stellarium, or Star Walk help you plan what’s visible tonight. Smart telescopes have this built in, but it’s still helpful to check beforehand.
Common Mistakes to Avoid
Not Leveling the Tripod
If your tripod isn’t level, the telescope can’t accurately track objects. They’ll drift out of frame. Use the bubble level (built into some telescopes or get a separate one) to make sure you’re level.
Forgetting to Update the App
App updates fix bugs and often add new features. Before a big observing session, check for updates.
Shooting Through Trees or Buildings
Even if you can barely see the object through branches, it messes up tracking. Make sure you have a clear view.
Giving Up Too Quickly
Your first images might look disappointing. Keep stacking. The magic happens after 30-40 minutes when faint details start appearing.
Ignoring Light Pollution
Some targets (like the Horsehead Nebula) really need dark skies. If you’re in the city, focus on brighter targets that punch through light pollution (M42, M31, M13).
Frequently Asked Questions
Can smart telescopes work in the city?
Yes, absolutely. Models with built-in light pollution filters (like the Seestar S50 and Dwarf 3) or advanced light pollution rejection (like the Unistellar telescopes) work really well in Bortle 6-8 skies. You won’t see every object, but bright galaxies and nebulae show up nicely.
Do I need any astronomy experience to use these?
Nope. That’s the whole point of smart telescopes. You don’t need to know how to polar align, or how to find objects manually, or even what those constellations are called. The telescope does everything. You just pick what you want to see from the app.
What can I actually see with a smart telescope?
Way more than you’d expect. You can image hundreds of galaxies, nebulae, star clusters, the moon, planets, and even some asteroids and comets. The images will legitimately look like what you see in astronomy magazines, just at a smaller scale.
How long does setup take?
For budget options like the Seestar or Dwarf, setup is 5-10 minutes. For premium models like the Origin or Odyssey Pro, plan for 15-20 minutes. Most of that time is letting the telescope cool down and initialize.
Can I use these for visual observing?
Sort of. The eVscope 2 has an eyepiece specifically for visual observing (enhanced with digital amplification). Other smart telescopes only show images on your phone screen. Traditional telescopes are still better for pure visual observing.
What about planetary photography?
Smart telescopes aren’t ideal for planets. They’re optimized for deep-sky objects (galaxies and nebulae). For serious planetary photography, you want a traditional telescope with long focal length. That said, the moon looks amazing through any of these.
Do these telescopes need WiFi or cell service?
No. They create their own WiFi network that your phone connects to. You can use them in the middle of nowhere with no cell service or internet.
Can I share images immediately?
Yes. All these telescopes save images to their internal storage or your phone. You can instantly share them on social media, which is honestly part of the fun.
What about maintenance?
Smart telescopes are pretty low maintenance. Keep the lens clean (use a proper lens cleaning cloth), make sure the firmware is updated, and store it somewhere dry. That’s basically it.
Will these become obsolete quickly?
Technology always advances, but these telescopes should be useful for 5-10 years. Companies release firmware updates that add new features to existing models. The Seestar S50, for example, keeps getting better with each update.
Which Smart Telescope Should You Choose?
Here’s the honest recommendation based on different situations:
If you’re a complete beginner with limited budget
Get the ZWO Seestar S50. At $549, it’s the best value in smart telescopes. You’ll get excellent results, learn what astrophotography is about, and you can always upgrade later if you want more.
If portability is your top priority
Go with the DWARFLAB Dwarf 3. It’s tiny, weighs nothing, and fits in any bag. Great for travel, camping, or taking to dark sky sites.
If you live in a city with bad light pollution
The Unistellar Odyssey Pro is expensive but genuinely worth it for city shooting. The Enhanced Vision technology pulls out objects you shouldn’t be able to see from urban locations.
If you want professional-quality images
Either the Vaonis Vespera Pro or Celestron Origin Mark II, depending on whether you want portability (Vespera) or absolute best image quality (Origin).
If you’re on a tight budget
The ZWO Seestar S30 at $449 is cheaper than the S50 and still produces great images. You sacrifice a bit of aperture but gain the wide-angle lens for versatility.
Final Thoughts
Smart telescopes have completely changed astrophotography. What used to require thousands of dollars in equipment and years of learning can now be done with a single device costing a few hundred bucks.
These tools have made astrophotography accessible to everyone. The learning curve is so much easier than it used to be.
The recommendation: start with whatever fits your budget. Even the cheapest smart telescope will blow your mind the first time you see a galaxy on your phone screen. You can always upgrade later if you fall in love with the hobby.
The best telescope is the one you’ll actually use. If a $500 Seestar means you go out observing every clear night, that’s way better than a $5,000 telescope sitting in your closet.
Clear skies and happy imaging!
Related Articles You Might Find Helpful
- Best Smart Telescopes 2026: Complete Buyer’s Guide
- Getting Started with Astrophotography: A Beginner’s Guide
- Understanding Light Pollution and How to Work Around It
- Best Tripods for Smart Telescopes and Astrophotography
- Post-Processing Astrophotography Images: Complete Tutorial
